Introduction
In this laboratory you will implement closed-loop control laws for a wheeled rover robotic vehicle, as shown in Figure 1.
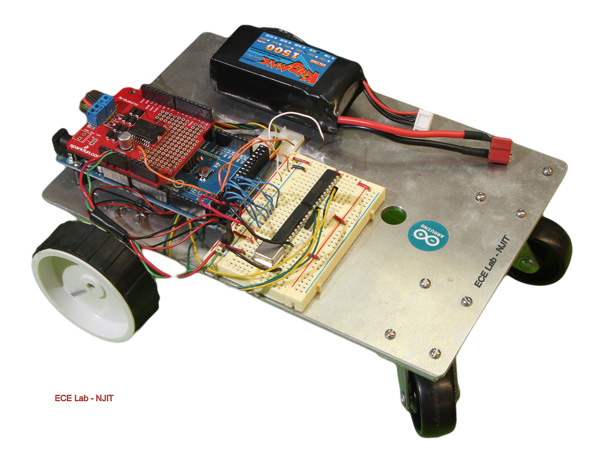
Figure 1 Top View of Rover
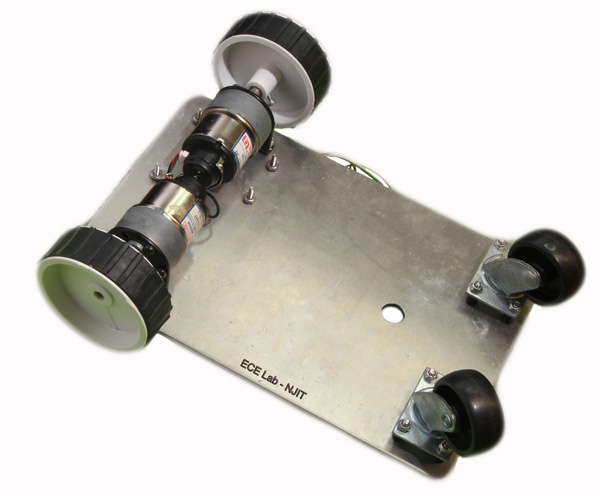
Figure 2 Bottom View of Rover
Each team will be issued a robotic rover vehicle and will be expected to return the vehicle in good operating condition at the end of the semester. You will be able to work on the experiments in the laboratory during scheduled hours, and you are permitted to take it home, if you wish.
The rover comprises:
- Platform on which is mounted
- Two motors, each with an outboard wheel and an inboard incremental shaft encoder.
- A motor controller that provides independent control of each motor.
- A solderless protoboard containing 2 up-down counters, one for each of the incremental encoders.
- A 12v rechargeable battery.
- An Arduino Mega2560 controller (which serves as the �brain� of the closed-loop system.)
A schematic diagram of the system is shown in Figure 3
Figure 3. Simplified Schematic
All the components of the system will be wired, so after checking the connections, your task will be to program the Arduino for your experiment using the development environment, download the program, via a USB cable, to the Arduino, and run the program to perform the experiment.
Arduino
The Arduino Mega2560 is one of the high-end members of the Arduino family, which is widely used for student projects because
all the development software is open-source and readily downloaded from the official
The software will have been downloaded and stored on the computers in the laboratory, but it is highly recommended that you download and install the software on your individual computers.
The Arduino is programmed in a language which is essentially C/C++, with functions added to facilitate accessing the input and output ports of the unit. The available documentation has a complete listing of all the functions, and includes a number of tutorials and examples. (When reading the documentation, note that in the Arduino lingo a program is called a �sketch�, and an interface device is called a �shield�.)
Power
A 12 v d-c power supply and a 12 v rechargeable battery are provided. Either can be used to power the motors and the electronics including the Arduino. When the range of motion is suitable, it is recommended that you tether to the power supply to minimize the need for recharging the battery.
The Arduino can be powered from the USB port, which is convenient for program development and testing.
Laboratory Notebook
Although you will be working in groups, each student is expected to keep his/her own digital notebook in the form of an MS Word file. Laboratory progress will be reported to the instructor by emailing the section of the notebook describing the work done during the reporting period. At the end of the semester, each student will submit the complete notebook, which will be an important component of the grade in the course.
Experiments
You are expected to complete several "experiments", or tasks, based on the rover vehicle.
You are not required to perform a fixed number of experiments. The first two experiments should, for obvious reasons, be done in the order listed. The other experiments need not be done in the order listed.
The following is a synopsis of the possible experiments. More details will be provided in individual experiment write-ups.
- Checkout and testing of the vehicle.
Check wiring and program Arduino to verify operation of the system. - Position servo.
Program the Arduino for precise linear and for precise rotational motion, and verify operation. - Autonomous trajectory following.
Program the Arduino to autonomously follow a predefined trajectory stored in the computer. - Climbing and balancing on a see-saw.
Program the Arduino to climb a balance beam and remain in a stable balancing position . - Inverted pendulum.
Mount an inverted pendulum on the rover and program the Arduino to move the rover in a straight line while keeping the pendulum balanced. - Articulated vehicles. (To be done by two teams.)